8/30/15

Serving Others

Matthew 23:11           Proverbs 19:17          1 John 3:18          Matthew 25:35-40     Matthew 20:18           Mark 7: 1-23              Matthew 5:42      Matthew 6:1-4           1 Timothy 6:18

There are so many verses that this activity would go with that I will not bother to try to list them all.

Before we get started, I simply must tell you where I found this brilliant idea: The Fickle Pickle. The kids LOVED this activity. Thank you Fickle Pickle!


This lesson is about serving others, so we went undercover to bestow kind deeds upon our friends and family. Each child was given a Top Secret envelope containing a pair of undercover sunglasses (standard issue for a secret agent, don't ya know), a self-stick mustache (to complete the disguise, of course), a pencil and a mini notebook (to keep track of deeds performed), a Mission Possible letter, and a list of Secret Service Suggestions. I did not include a picture of my Mission Possible letter or my Secret Service Suggestion list because you really need to see the ones written by The Fickle Pickle. I changed mine slightly to fit our situation, but her examples are so fun!!


Materials:


I found the cute envelopes at Knowledge Tree. They actually aren't envelopes at all. They are Jumbo Library Pockets. I folded over the top portion and taped them shut to serve as envelopes. All others items were found at the Dollar Store. Don't forget to include a Mission Possible letter and some Secret Service Suggestions!I can't wait to hear what great things the kids did to serve others this week!


NOTE:  All images, text and printables contained herein are copyright protected. This material is for your personal use only. I encourage you to print or pin from this site whenever you would like as long as it is credited and linked back to EasyBreezySundaySchool.blogspot.com. Failure to link back and credit my site constitutes a copyright violation.  Thanks so much!


8/16/15

WELCOME BACK!


The first day back after summer is always exciting for me. I have had two months to plan the new Sunday school year and to test drive a few new crafts. I never get as much done as I hope for, but that's okay. I like setting my goals high. Why set them low, right?!

We have a new volunteer teacher in the 3rd & 4th grade room this year. I am excited to be sharing the class with her. Having her help means I will be teaching every other Sunday. I hope this translates into more time to blog. We'll see if I can make that happen. :)

This year I chose to decorate the door using items founds at The Knowledge Tree. (I love that place!) I added sticky letters to the banner, and I made a flower pot out of poster board and border paper. It was a splurge monetarily, costing a total of $35.00, but I will reuse the individual pieces in other projects, and it was fast to assemble, so I think it was worth it.


NOTE:  All images, text and printables contained herein are copyright protected. This material is for your personal use only. I encourage you to print or pin from this site whenever you would like as long as it is credited and linked back to EasyBreezySundaySchool.blogspot.com. Failure to link back and credit my site constitutes a copyright violation.  Thanks so much!

5/10/15

Love One Another

John 15: 9-17


Happy Mother's Day! Today we studied Jesus' instructions for us to love one another as he loves us. What a perfect lesson for Mother's Day. Since LOVE is our theme today, finding a craft that would make a good Mother's Day gift was a breeze. I hope you enjoy this precious flower-in-a-pot craft. This one is suitable for all ages.


Materials:


  • Hot Glue Gun or Craft Glue
  • Colored Paper
  • Craft Sticks
  • Heart Punches, Large & Small
  • Seed Starter Pots
  • Shredded Brown Paper
  • Green Paint (optional - see Pre-Class Prep note below)
  • Paint Brush (if painting)
  • Glass Gems (or Pebbles)
  • Buttons or Pompoms
  • Labels/Tags (optional - see #10 below)
  • Pens, Sharpies, Crayons (optional - see #10 below)


Pre-Class Prep:

The only thing to do before class for this craft is one simple optional step. Originally, I planned to use the craft sticks that can be purchased already painted green for the flower stem. However, when I stumbled upon these really cool shaped craft sticks in Michele's I could not resist even though I knew they would require painting. I considered letting the kids color the stems themselves with crayons, but as time is always too short, I knew it would be wiser to do this beforehand.


Instructions:

The whole thing can be constructed with regular kid-friendly craft glue or with hot glue. I prefer hot glue because it sets up quickly making it easier for the kids to carry the project home without it falling apart. Of course if using hot glue, use with caution and do not allow the kids to handle the glue gun.

1. Apply a generous ring of glue around the bottom of the flower pot. A little more than this, actually:


2. Stand a green stem up in the middle of the pot. Add a single layer of gem stones around the base.


3. Apply another heavy ring of glue around the top of the stones. Add more stones. The stones will add weight to the pot and glueing them in with the stem holds the flower securely.


4. Spread one more ring of hot glue on top of the last addition of stones and top with the shredded brown paper. Pack the paper down well.


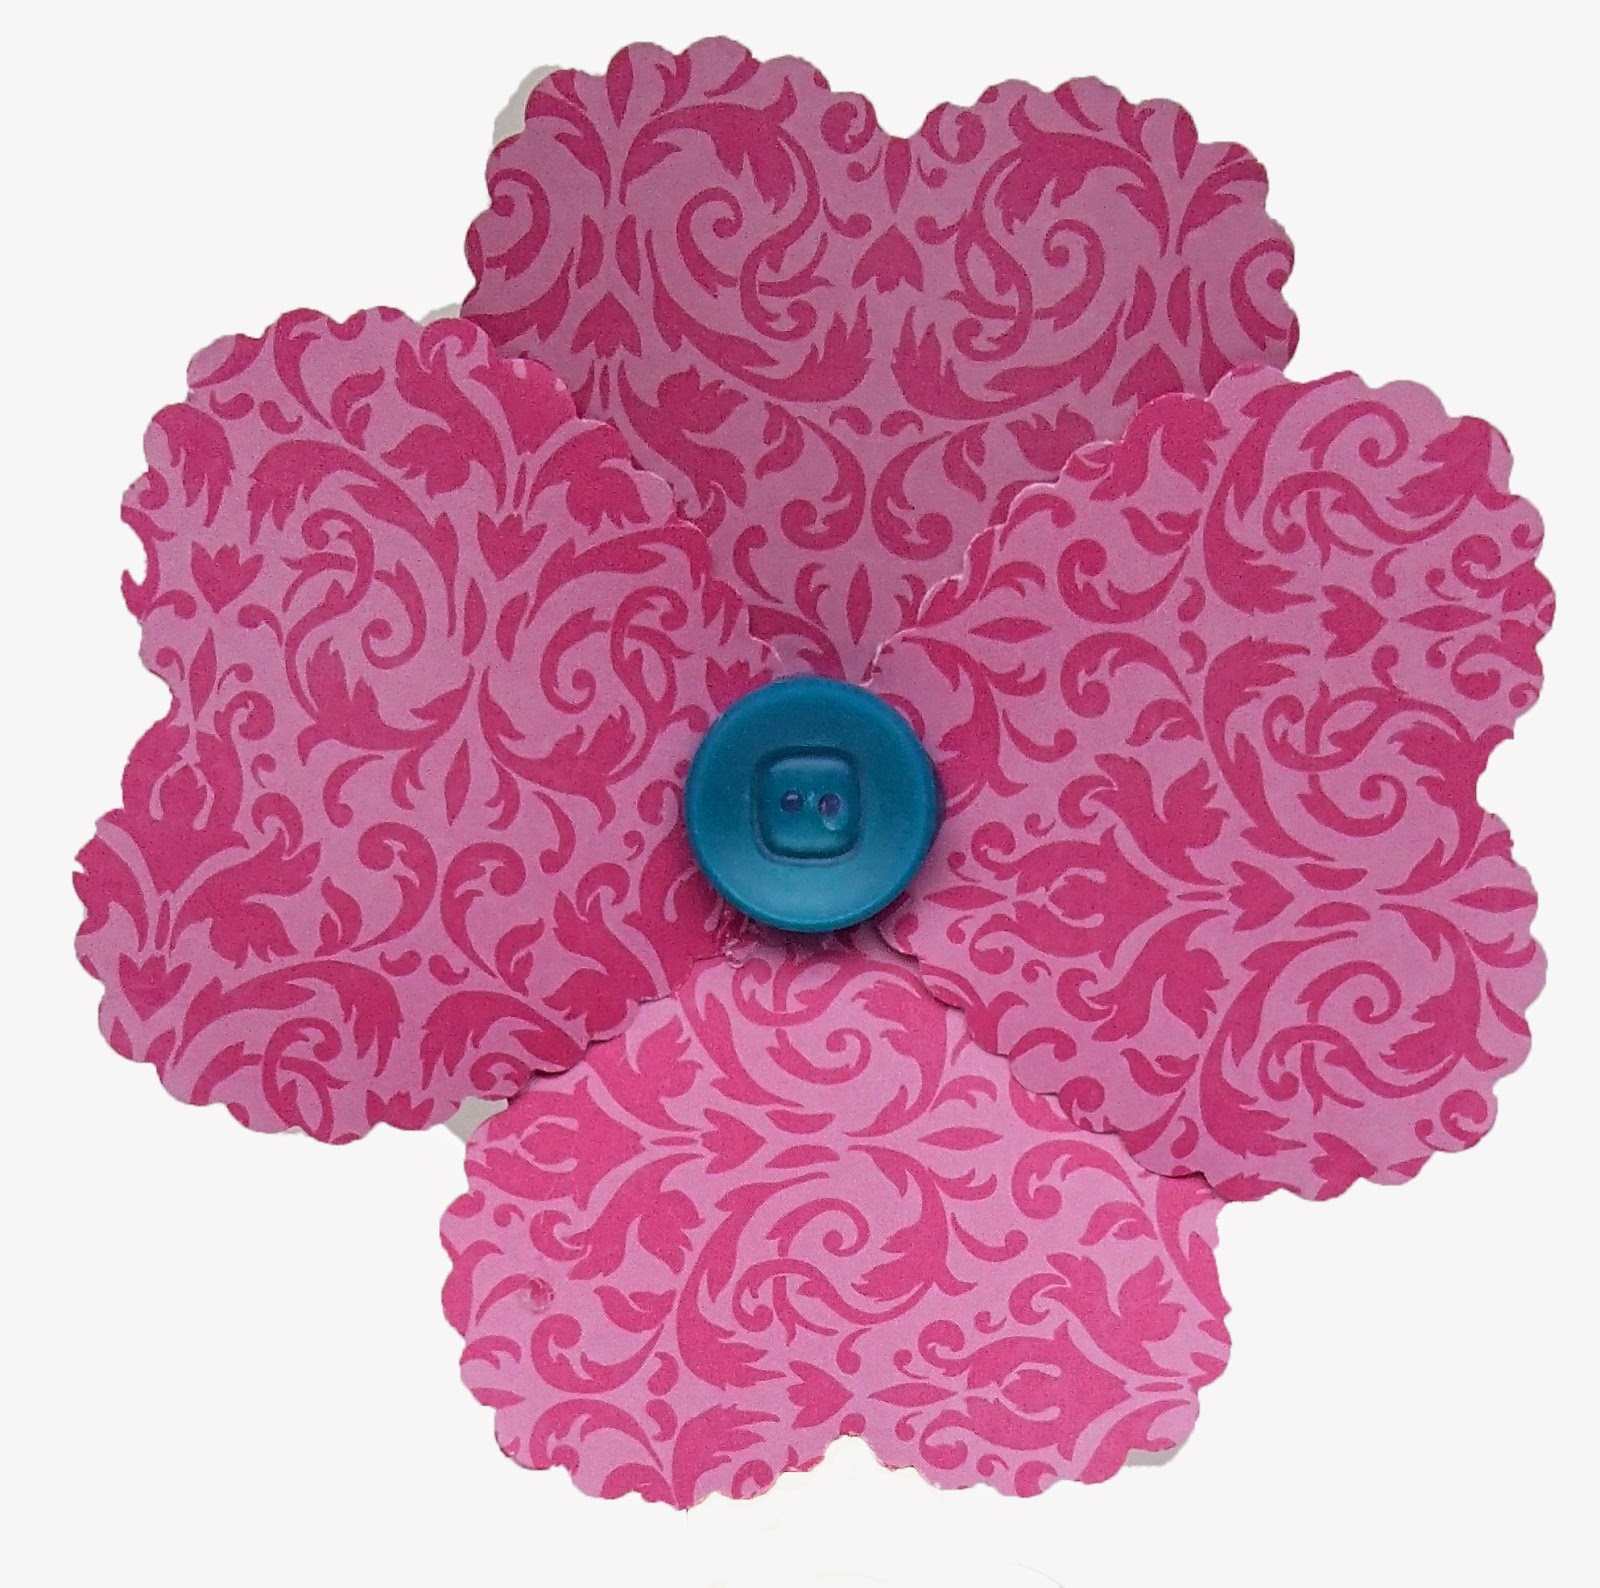
5. Using the heart punches, cut two small hearts for the leaves and 4 or 5 large hearts for the peddles (for each flower).


6. Glue the tips of the peddles together.

7. Glue a button, pompom, or any other small item in the center.


8. Attach the flower head to the top of the stem with glue.

9. Glue the leaves in place. The leaves should go on last so the placement is easier. 


10. Another option, that my kids decided not to do, is placing a label/tag on the pot. In my Materials picture above, you will see that there are a stack of white decorative labels and a few sharpies. I told the kids they could write a note to their mother (e.g., Happy Mother's Day) on the label and then stick it to the flower pot. But, since none of them actually did that, and the labels are in my materials list, I thought I should mention it.


NOTE:  All images, text and printables contained herein are copyright protected. This material is for your personal use only. I encourage you to print or pin from this site whenever you would like as long as it is credited and linked back to EasyBreezySundaySchool.blogspot.com. Failure to link back and credit my site constitutes a copyright violation.  Thanks so much!


4/26/15

The Good Shepherd

John 10:11


Today's lesson is The Good Shepherd, but our craft will work for numerous other Bible lessons as well:

The Good Shepherd, Luke 15:307
Abraham Tested, Genesis 22
The Lord Is My Shepherd, Psalm 23
The Lamb Of God, John 1:29
And there are many others.


Materials:


1. Bathroom cups
2. Black construction paper
3. Black pipe cleaners
4. Cotton balls
5. Scissors
6. Craft glue
7. Craft sticks (i.e. popsicle sticks)
8. Pencil and pen (or sharpie)
9. Stapler (or tape, but stapler is better)
10. Googly eyes

Pre-class Instructions:

There are only a few simple things to do before class to make this craft go quickly and smoothly.

1. Cut pipe cleaners to 9 inches in length. Each sheep will require 2.

2. Draw the sheep head outlines on the black construction paper. One for each sheep.

3. I have found that it is best to go ahead and cut out the heads. Older children (3rd grade and up) are capable, certainly, of doing this themselves, but as you know, I am all about making the most of our precious class time. I knew the kids would enjoy glueing on the cotton, so having pre-cut heads allowed us all to relax and have fun with it, without me fretting over the clock. I made a variety of sizes so the kids could have a choice. I also did not try to make them perfect. Just freehand it; it'll be fine.


That's it. Let's get started!

In-class Instructions:

1. Give each child:
      - One cup
      - Two pipe cleaners
      - One craft stick
      - One sheep head
      - A mound of cotton

2. Instruct them to fold each pipe cleaner in half.

3. Next bend small feet at the ends of the pipe cleaner. Each child will do this their own way, regardless of how you show them how to make the bends. Some may choose not to have defined hooves at all. And that's just fine.


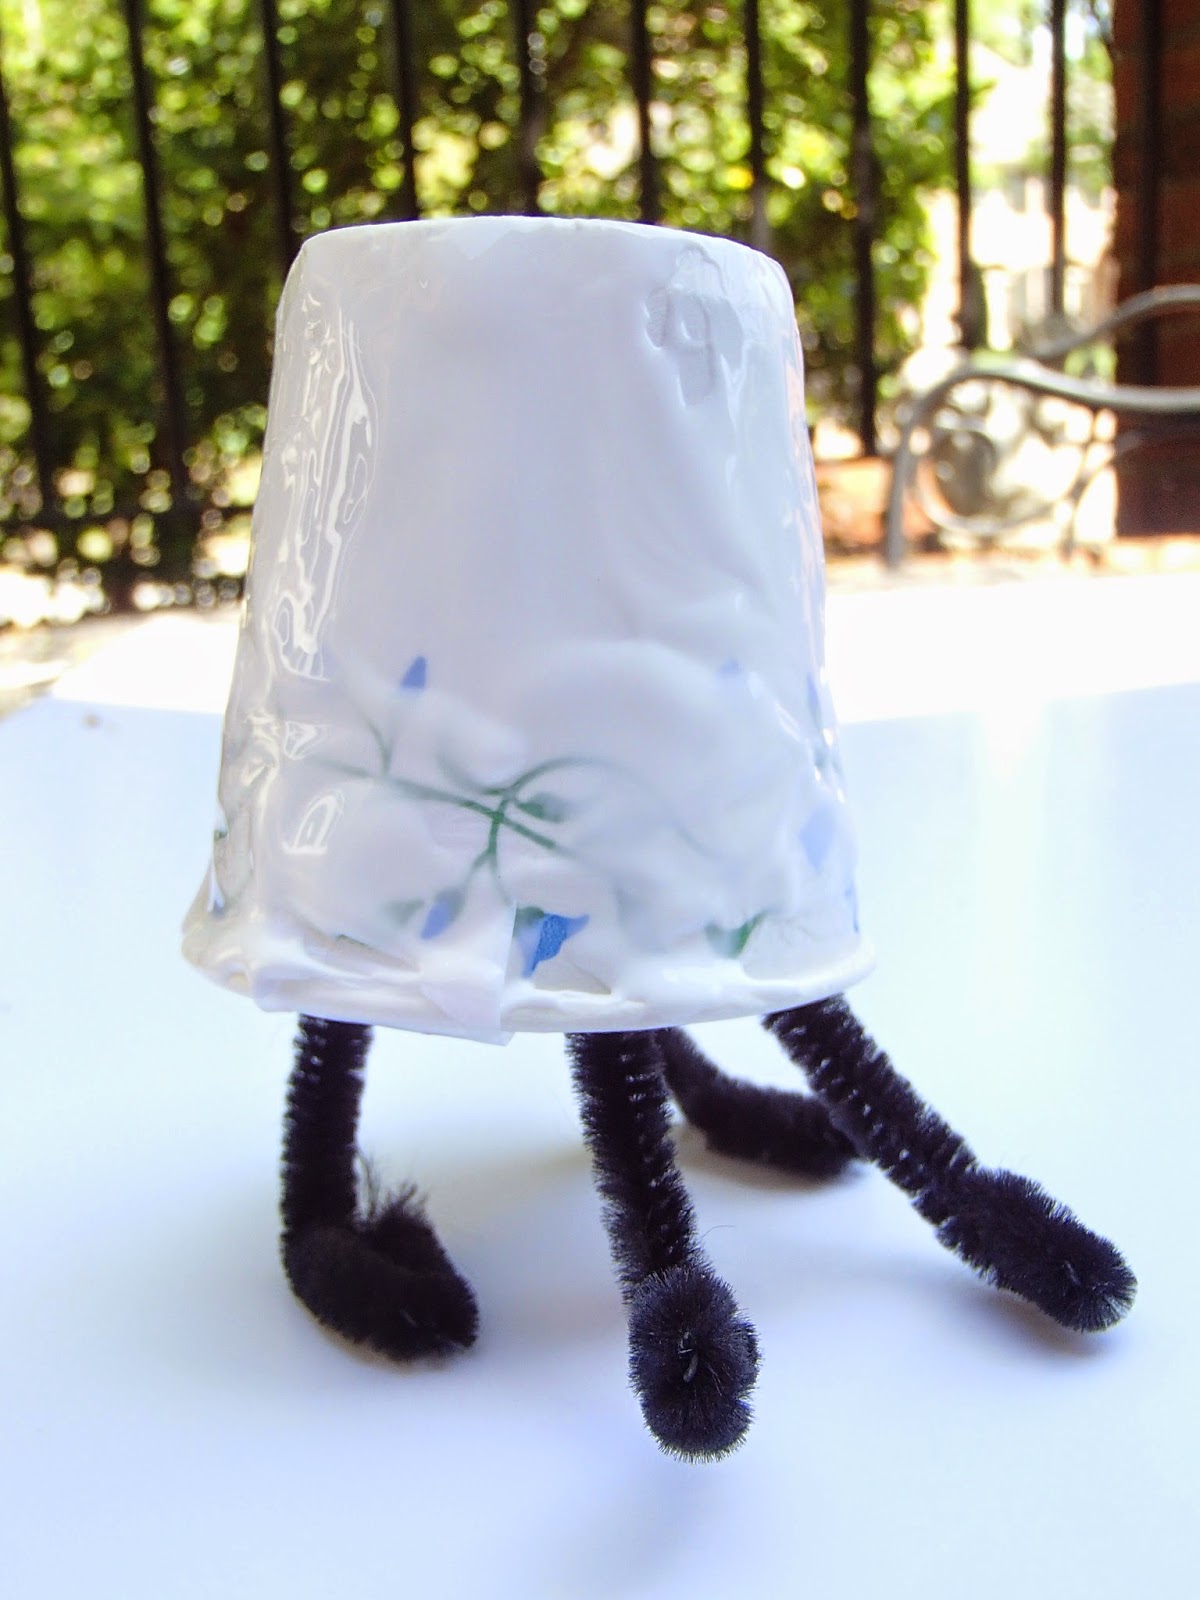
4. Staple the legs to the inside of the cup. Do not let the kids do this part. It's quick to walk around the table stapling legs while the children are folding the feet. If you have a lot of kids to get to, ask them to proceed on to step #5 until you finish with the stapling.


This is what it should look like at this point:


Note: I used tape instead of staples on the prototype, pictured above. The tape did not hold as well as the staples and it was difficult to work with in the tight space. This is when I decided staples would be better.

5. Ask the children to slightly flatten the cotton balls by pulling the cotton to loosen it. Don't overdo it. Less is more. This step is not required, but it will make the cotton balls not as heavy. It also gives them something to do for a moment while you finish with the stapling of legs.

6. Now "paint" the glue onto the cups using the craft stick as a paint brush. Start at the top and work down to the rim. The easiest (and cleanest) way to handle the glue is to walk around the table squirting glue onto each child's stick as they need it. This allows you control over the glue! :)  I like using bathroom cups because the kids can easily hold onto their project by slipping one hand up inside the cup while dealing with the glue. Very little glue ends up elsewhere this way.


Tip: Tacky Glue is thick and sticky. It works great for this project.

7. Add the cotton. Again, holding the sheep with one hand inside the cup, press the cotton all over the cup.

8. Glue eyes to the face.

9. Draw a mouth with pen or sharpie.

10. Glue the head to the body.

All done!


ONE MORE SIDE NOTE:
As long as the faces and pipe cleaners are pre-cut, and you don't have a huge class, or some other special circumstance, this craft should only take about 20 minutes. It goes much faster than it sounds here. I tend to be heavy on the instructions, because I want you to know everything I can possibly tell you, so that your experience will be a smooth one.


NOTE:  All images, text and printables contained herein are copyright protected. This material is for your personal use only. I encourage you to print or pin from this site whenever you would like as long as it is credited and linked back to EasyBreezySundaySchool.blogspot.com. Failure to link back and credit my site constitutes a copyright violation.  Thanks so much!

4/19/15

Doubting Thomas

John 20:24-31


Here's a super easy game to make! And it's even easier to play! The Doubting Thomas Game is basically as True or False game. 

How To Play:


-- Give each child an "I Doubt It" sign.

-- Read aloud one item from the list of unusual facts about the bible. Be sure to read the facts so the answers will sometimes be true, and sometimes be false.

-- Anyone who doubts the statement is true should hold up their sign showing the "I Doubt It" side toward the teacher. 

-- Anyone who believes the statement is true does nothing.

-- Give the players with the correct answers a point for each correct answer. Remember our Bingo Buttons? To make score keeping easier, I gave each player a button for each correct answer. At the end of the game, we simply counted the buttons to see who won. 

--The player with the most points (or buttons) at the end wins the game.


Materials:


This only takes a few things.

1. Front and Back pics. One set for each child/sign.

     Color download here: 
Front and Back.

     B&W download here: 
Front and Back.

2. Cardstock

3. Paint stir sticks
     (or craft sticks,
       or strips of balsa wood). One for each child.

4. Questions. More about this at #6 below.

5. A stapler.


Construction Instructions:

Realizing some may want to use this, when time allows, for a craft AND a game, and others will only have time for the game, I have included the graphic as a coloring page and as a full color image. If using it as a craft, I would suggest that you put the sign together yourself at home before class and just have the kids color it already made up.

1. Print the images onto the cardstock (one front and one back for each sign).

2. Cut out the images.

3. Staple the front and back together at the top and sides. No need to overdo it. I found one staple at the center-top, and one at the center-side of each side was sufficient. 

4. Insert the paint stick between the two pieces. Push it all the way to the top until it touches the top staple.

5. Place a staple on each side of the stick at the bottom. Do not try to staple through the stick. I considered placing a small line of glue on each side of the stick, but decided I wanted to have the option of re-using the stick for something else in the future if I wanted. I never know how many kids will be in Sunday school each week, so this prevented me from making fifteen, and then only using four, thereby waisting eleven perfectly good paint sticks. The sticks stayed in place just fine without the glue anyway.


6. Collect a list of bible facts. I found a website, JesusAlive, that gives a great list of little-known facts about the bible. Some of them are too advanced for third and fourth graders, but I found plenty for my game that was appropriate for my class. What I really appreciated was the way the author, Steve Shirley, gave the corresponding verse and a pop-up window with the quoted scripture. Seriously, it only took ten minutes to gather my list of questions. I opted not to give you my list of questions in a download. Mr. Shirley has done a great job with his list and it is well worth a visit to his site. He has obviously put a lot of work into it, and I don't want to get into any questionable infringements, so click on over to his list for help. 


Food for thought:
As I was preparing my lesson for today, I kept thinking about Jesus' response to Thomas, "Blessed are those who have not seen and yet have believed." John 20:29 NKJV

Our whole lesson today revolves around the fact that Thomas was hesitant to believe what others told him. I felt it was important to distinguish between doubting Jesus' power verses doubting what others may tell us. In dealing with children, especially in today's dangerous world, I wanted to be very careful not to give them the impression we should not doubt anything, so we spent about five minutes talking about why it is good to question things we hear that may sound suspicious, and why we should trust in God completely and never doubt His power. 


NOTE:  All images, text and printables contained herein are copyright protected. This material is for your personal use only. I encourage you to print or pin from this site whenever you would like as long as it is credited and linked back to EasyBreezySundaySchool.blogspot.com. Failure to link back and credit my site constitutes a copyright violation.  Thanks so much!


3/21/15

Easter Egg Toss Game

(Matthew 21-28) Holy Week events &
(Matthew 28:6) He is risen!


Here's another idea that bloomed from Pinterest! The original idea came from Mammabeefromthehive.blogspot.com.au , but I made a change or two to make it into an educational game.


How To Play:


I added an element to the traditional toss game to make it educational by filling sixteen easter eggs with one question each. 


Each child, in turn, will pick an egg from the basket, open it, read the question aloud, then answer the question. If they get the answer correct, they get to toss their egg into the cups. If it lands in a purple cup, they get a treat (jelly bean, piece of chocolate, etc.) If it misses the cups or lands in a clear cup, no treat. If they get the answer wrong, they return the egg (with the question still inside) to the basket for someone else to pick. [Note: they do not get to toss the egg if they get the answer wrong. This sounds a little harsh, right? Well, not really, because we will have just reviewed all the answers in detail while making our Holy Week Bookmarks (see post below). When we are going to play a game, I always tell the kids to pay close attention to the lesson because they will have to answer questions during the game. This makes them extra alert! :) I make it very clear what questions may be asked during game play, so the kids are well prepared by the time we get to the game.] After all the questions have been answered, everyone gets to toss empty eggs until they tire of it.


Materials:


I am sure lots of different materials would work for this. I scouted around my house and used what I already had on hand. Feel free to do the same. I love it when I can recycle items AND I don't have to go to the store!


1 Foam core board
34 Clear plastic cups
X-acto knife
Scissors (or paper cutter)
Ruler
Cylinder (soup cans, empty Pringles can, wrapping paper roll, 2 more of the clear plastic cups, or anything that can serve as legs)
Basket
Plastic Easter eggs
Questions & Answers (download here) 
Approximately 6 pieces of purple construction paper (purple because that is the liturgical color of Easter)
Optional: circle cutter


How to build:

1) Line up the cups 5 columns by 7 rows. 

2) Measure the area at the bottom of the cups. 

3) Cut the foam core big enough for all the cups to fit on.

4) Hot glue the cups to the foam core. I wasn't sure if the hot glue would make the cups melt or not. I'm happy to report, it didn't. The hot glue worked beautifully.


5) Cut the cylinder to the desired height. 


6) If using a cardboard cylinder, cut one end at an angle to hold the core at an angle. If using something like cans that cannot be cut, just hot glue the edge that touches the board. There is no need to make this thing super strong. The cups weigh next to nothing and there will not be any pressure put on the board. The only purpose of the legs is to tilt the board at an angle.


7) Hot glue the legs to the underside at the top end only. The bottom end will rest directly on the floor. Exact placement doesn't matter as long as it isn't wobbly. 

8) Cut eleven strips of purple construction paper to fit inside the eleven cups that form a cross. I also added circles to the bottom of the cups because I like the way it looks better. The circles are completely optional, though. It would be fine either way.


9) Print and cut out each question. Place one question in each egg. Place eggs in the basket. NOTE: My questions are about the days of Holy Week. Of course, any questions would work just as well. I typically have 7 to 10 children in my class any given week, so 16 questions were plenty. If your class is larger, you may want more. If you need question ideas, send me an email, and I'll be happy to help.

That's it. Very easy. Very fast. Once I decided on the materials, it only took about 30 minutes to build the game board and another 5 or 10 to prepare the eggs.


Happy Easter! 


~~~~~Update: 
Oh, what fun we had today! The kids loved this game! And I have to say, making the bookmarks before playing the game worked out perfectly. By the end of the game, everyone had a great understanding of the order the Holy Week events and were excited to take their bookmarks home so they could refer to it each day during the upcoming Holy Week. 


The kids were not ready to go home when their parents came to pick them up. Don't you just love it when that happens?!


I am very careful to not take pictures of children for the blog for privacy & safety issues, so sometimes my pictures do not adequately reflect the excitement we experience in class. This is definitely one of those times.


NOTE:  All images, text and printables contained herein are copyright protected. This material is for your personal use only. I encourage you to print or pin from this site whenever you would like as long as it is credited and linked back to EasyBreezySundaySchool.blogspot.com. Failure to link back and credit my site constitutes a copyright violation.  Thanks so much!

3/20/15

Holy Week Bookmark

Matthew 21-28


Two and a half weeks till Easter, but only one more Sunday school class. Hmmmm...how am I going to pack so much material into one lesson? Well, certainly, I can't. Holy Week alone could be eight different lessons. Although my lesson plan this week focuses on events that happened prior to Holy Week, it just seems wrong to completely ignore such a significant time (the most important event on the Christian calendar) just because we will not actually have class that week.

When I was a child, Holy Week meant very little to me. I heard the adults talking about various events, but I couldn't absorb it for the growing anticipation of Easter. There was only so much my young brain could focus on, and sadly, the Easter basket weighed heavily in my thoughts. Everything else skipped across my consciousness like a stone across a pond. 

One of my goals as a Sunday school teacher is to help children see the chronology of biblical events. I especially would like them to have a deeper understanding of Holy Week. 

My third and fourth graders have a good grasp of The Last Supper and of Jesus being crucified, but what about the other events leading up to all that? They know Judas betrayed Jesus at some point, but when I briefly talked to them a few weeks ago about this, I saw blank stares when I referred to Judas as a spy. "A spy? Why is he a spy?" they asked. Often, I think we use the same language over and over to describe something (e.g., Judas betrayed Jesus), and the children get used to hearing it, perhaps can even regurgitate it back to us, but they don't always understand what we are saying. After I explained the Judas-spy relationship, I began wondering how much of the whole Holy Week concept do they really get? Individual events? Mostly, I'd guess, with a few blurry details (e.g., Judas was a spy). What other details are unclear? Do they understand how these events are related? Do they see the chain of events in order? I feel I should spend some time discussing Holy Week as if it were a movie, in today's kid-friendly language, so they can see exactly how each event led to the next, rather than studying eight individual incidents thereby disconnecting their relationship somewhat. And that is how the Holy Week Bookmark idea came about. 

As we glue each day onto the bookmark, I will retell the story in a movie-style format. Hopefully, open discussions will occur, so any unclear points may be addressed. Then, they will have this nifty little bookmark to refer to from now on to help them remember the relationship and order of the Holy Week events. 

On to the craft....

Now, I won't lie to you--the method I used for the bookmark was time consuming. But, don't fret, I am going to tell you how to do it more efficiently! :) First, let me explain why I did this the hard way. I mentioned that I am trying to pack a lot into this lesson, right? Well, I had already decided to make the Easter Egg Toss Game above. I think the kids are going to love that game, so I didn't want to scratch that idea to replace it with the bookmarks. Ideally, I would spread these two things out over two class periods, doing the bookmark one week, and the Easter Egg Toss Game the next week; but, since I don't have that option this year, and I'm determined to do them both, I had to do most of the work on the bookmarks myself.

So...here's how to make the bookmarks the hard way (and the easier way is in parenthesis):


Materials:


Paper Cutter
Card Stock
Fine Point Sharpie
Paint Swatches
Glue Sticks or any child-safe adhesive

Optional: Ziplock baggies for organizing chips


At Home Before Prep:

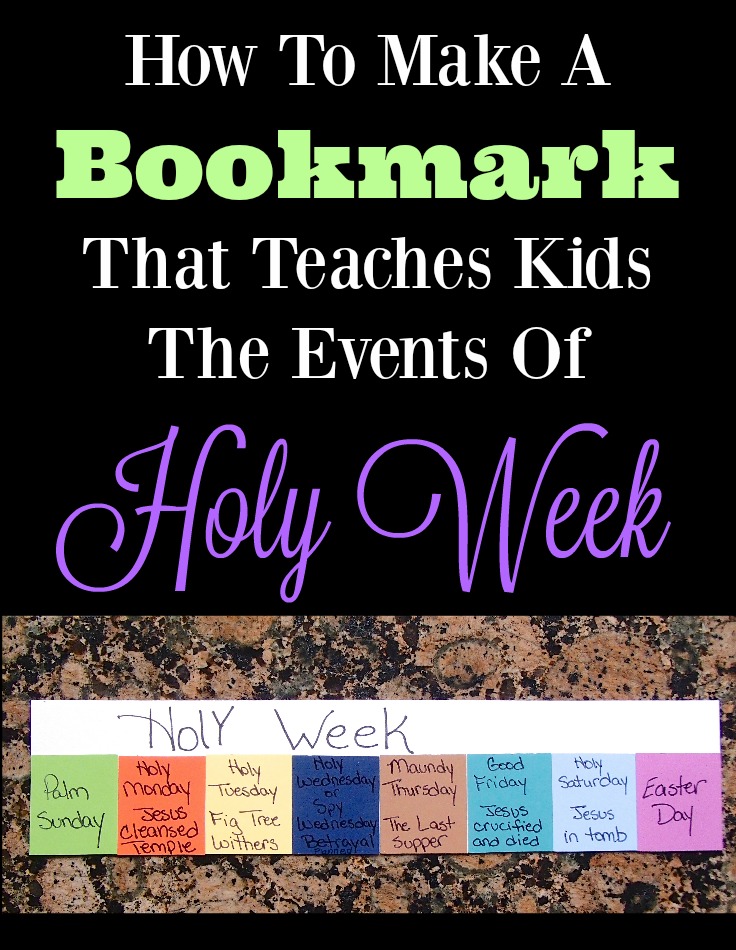
1) Cut out each paint color into squares. Our bookmark will cover eight days--from Palm Sunday through Easter Sunday. I could not find paint chips with eight colors already on one card, plus I thought the kids might enjoy mixing their own color combinations, so I decided to individually cut out the colors. This took much longer than I expected. (To make this fast and easy, use the paint cards with several colors on a card and let the kids glue together as many cards as they need to make eight days. Depending on the number of colors on the chips you find, they may not even need to cut any off.)


2) Next, using the paper cutter, cut out a bookmark for each child. The actual size will be determined by the size of your paint chips. Be sure to lay out eight color chips in a row to get an accurate measurement leaving extra space along the side/top to write "Holy Week" as a header if desired. I cut my bookmarks 8" x 1 3/4".

3) Because we will be pressed for time in class, I wrote on all the chips myself beforehand. This was a last minute decision or else I would have printed the info. on clear label sheets and cut to fit. That would have given a much cleaner appearance. (But preferably, if time allows, the kids could do all the writing themselves, and if larger chips are used, they could also draw a palm leaf on Palm Sunday, a fig tree on Holy Tuesday, etc.)

Class Instructions:

1) As you talk about each day, give the Holy Day name(s) (some have several), what happened on that day, and any other tidbit info. you like about the day. Have the kids glue that day onto the card while you are talking. Start with Palm Sunday and have them place it snuggly at the bottom left corner of the card (if orienting your cards as I did). Then as you go in order of the week explaining, it will be easy for them to line up each day squarely. (If you are using the paint strips straight from the store without cutting, glue them onto the card stock until you have eight colors in a row. The kids can write the day of the week and draw a picture for that day while you are talking about that day.)

2) Lastly, have them write "Holy Week" across the side/top of the card.


In an attempt to make this project as streamline as possible, I put each day in a separate snack-sized baggie. I will simply hand out each baggie with the instructions, "Take one, pass it down," as I'm talking about that particular day.


After we finish the bookmarks, we will move right into the Easter Egg Toss Game. And how great is this...? The bookmark activity will be the perfect review for the questions we will use in the Easter Egg Toss Game, so the kids should not have any problems answering the questions! 


~~~~~Update: 
What a great class. Please also read my update at the bottom of the East Egg Toss Game post above. The extra time I spent preparing this craft was well worth it. I'll do the Holy Week Bookmarks and the Easter Egg Toss Game, perhaps every year from now on, just like I did it this year (both in one day).


NOTE:  All images, text and printables contained herein are copyright protected. This material is for your personal use only. I encourage you to print or pin from this site whenever you would like as long as it is credited and linked back to EasyBreezySundaySchool.blogspot.com. Failure to link back and credit my site constitutes a copyright violation.  Thanks so much!