12/13/15

Christmas Treat

Here's a fast, simple, and cheap gift for the kids:

A Cup of Cocoa in a Bag


I found the cutest hot chocolate kits at Michael's this week! Each kit comes with designed marshmellows. The vanilla (blue) candy canes come with snowflake marshmellows, and the peppermint candy canes come with snowmen face marshmellows. Michael's also had a set of 16 pre-printed "have a sweet HOLIDAY" ziplock treat bags for just a few dollars. I had to go to the grocery to get the hot chocolate pouches.

It all made for a cute holiday happy for the kids.


Each bag contained one hot chocolate pouch, one candy cane, and one marshmellow.


NOTE:  All images, text and printables contained herein are copyright protected. This material is for your personal use only. I encourage you to print or pin from this site whenever you would like as long as it is credited and linked back to EasyBreezySundaySchool.blogspot.com. Failure to link back and credit my site constitutes a copyright violation.  Thanks so much!


Christmas Lanterns

Luke 9:5


I made a few changes to this old craft. It was a good idea, but honestly, I was disappointed. Here's how to not make the same mistakes....

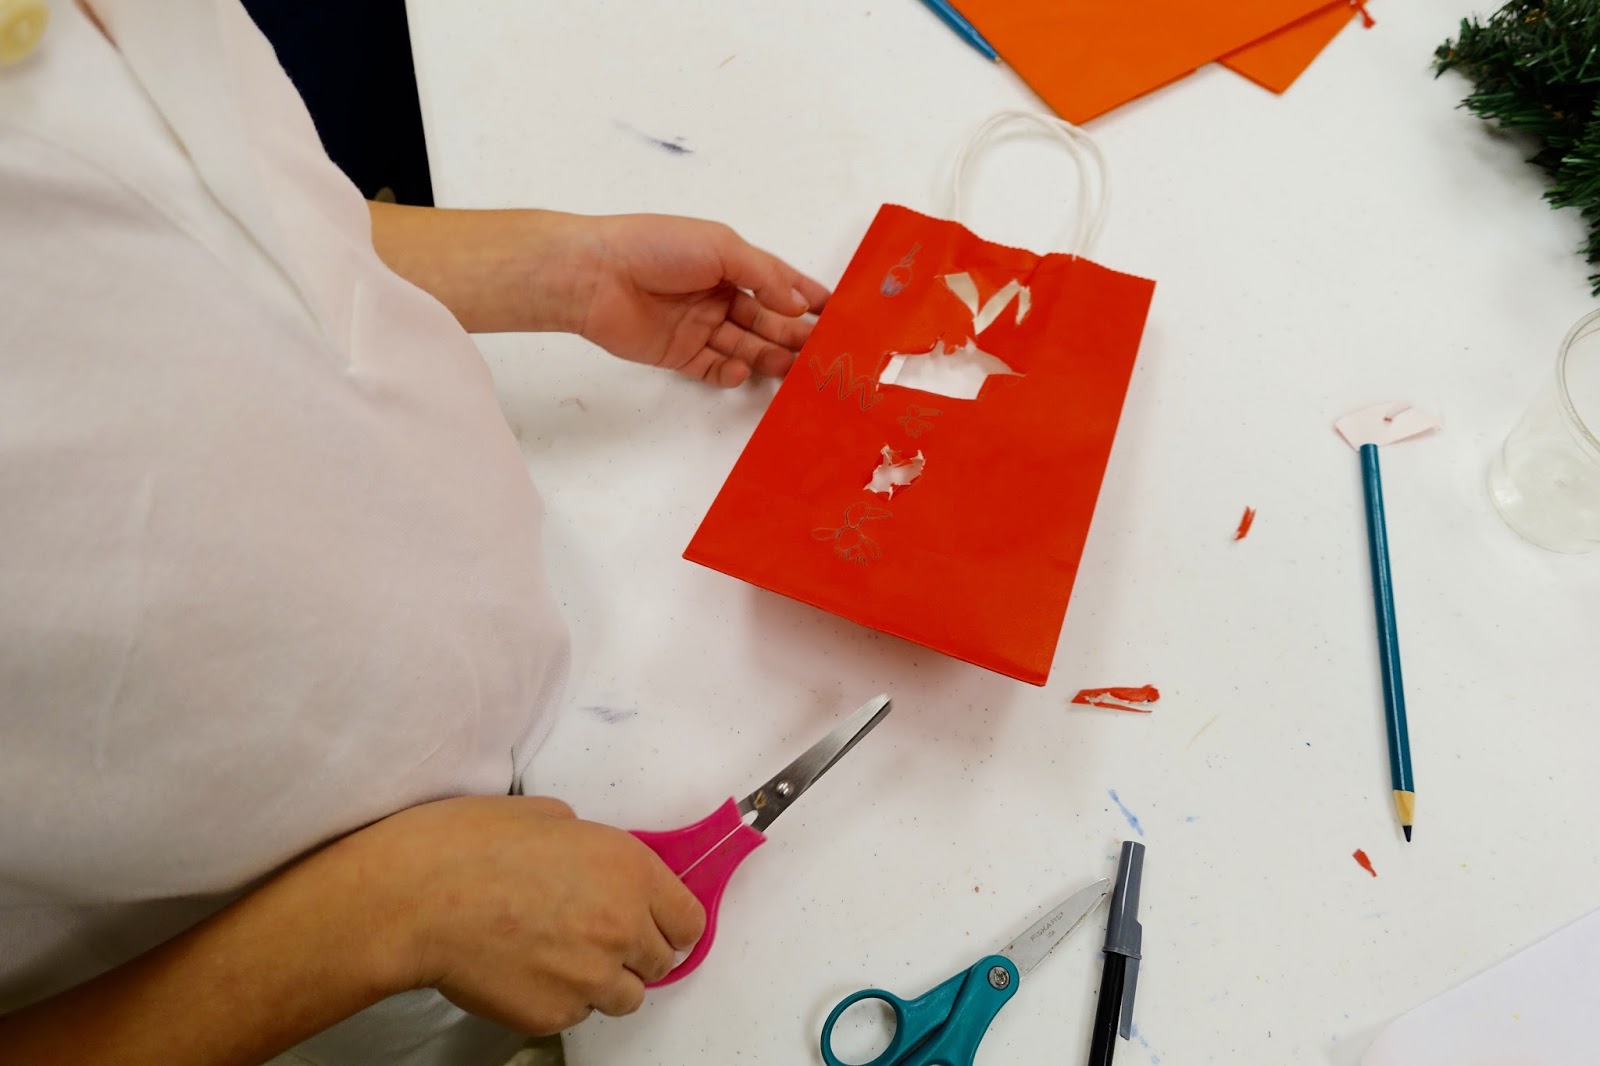
In an effort to cutesy up this craft, I decided to use colored gift bags with handles. The colors were nice, I thought. The handles will be ...handy, I thought. The "on sale" price made them almost as cheap as the standard lunch size paper bag, so why not, I thought. My reasoning was good; however, I did not realize is these bags are significantly thicker than the traditional cheap lunch bags. Big deal, right? Well, it was a big deal. Not catastrophe big, just "I won't do this again" big.

The bags were thick (especially in the area where the handles attach), and our child-safe scissors were dull, so making neat cutouts was impossible. We laughed it off and did our best, but next time I'll go back to the cheap lunch bags. The middle bag with baby Jesus is mine. It looks ok from a distance but, believe me, up close it is a jagged mess. LOL

Instructions:


1. Using a pencil, lightly draw shapes onto on side of a bag. Large, simple shapes are best, i.e. stars, hearts, circles.


2. Cut out the shapes.


3. Place a battery operated votive candle inside. I opted to skip the rocks/sand usually used as weight in the bottom of the bag because I reasoned that these lanterns will more than likely be displayed around the house and the weights won't be necessary. I told the kids they could collect a few rocks from their yard to put inside if they have trouble with it falling over. 


NOTE:  All images, text and printables contained herein are copyright protected. This material is for your personal use only. I encourage you to print or pin from this site whenever you would like as long as it is credited and linked back to EasyBreezySundaySchool.blogspot.com. Failure to link back and credit my site constitutes a copyright violation.  Thanks so much!


10/27/15

Jesus Heals Blind Bartimaeus

Mark 10: 42-56


Today we learned that blind Bartimaeus was healed by Jesus because Bartimaeus had such strong faith.

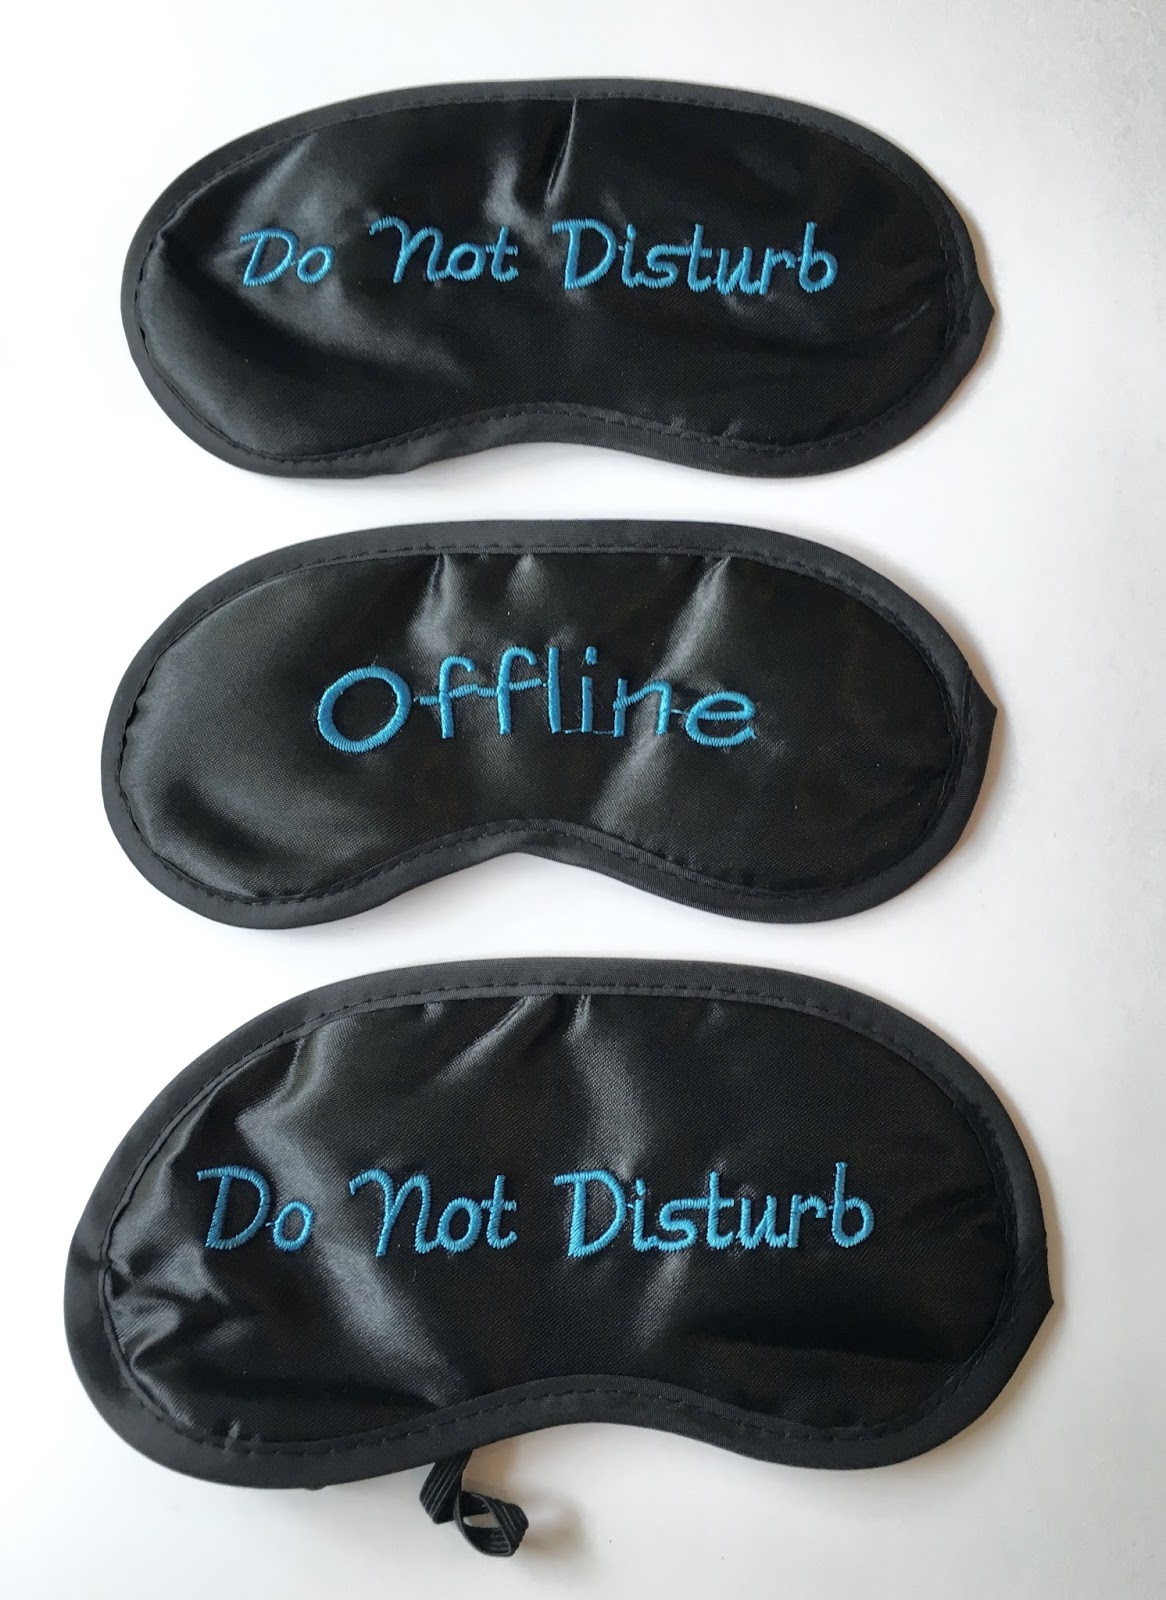
An easy activity to go along with this lesson requires very little prep. and allows the children to explore the challenges of being blind.


Materials:

One scratch kit found at Hobby Lobby:              


Blindfolds found at Dollar Tree:


This was a great lesson to talk about many topics. We first discussed people we encounter in our lives today begging on the side of the road. This is who Bartimaeus was—a beggar.

Next, we moved into sharing our experiences with people who are blind. Blind people typically have extraordinary hearing. This is probably how Bartimaeus knew it was Jesus who was walking nearby.

We wrapped up the lesson by talking about what it means to have faith.

I'd like to take a moment for a word of caution here. I would not suggest ever blindfolding all the students at once, unless there are other adults around as, hmmmm, witnesses. As a parent, I would be very upset with any adult who blindfolded my child, and everyone else in the room, except themselves. As a teacher, I wouldn't ever want my actions to appear questionable. Therefore, I asked two other adults to step into the room for the few minutes we were working with the blindfolds.

Each child was given a scratch card & a wooden stick. They were asked to draw any picture they liked, blindfolded. They enjoyed the challenge and we had a great time seeing how talented they all were without the help of their eyesight. 

This would also be a great time to talk about what sounds they heard while blindfolded. I planned to have that discussion, but we moved on into a game and I forgot. I'll post the game another time.


NOTE:  All images, text and printables contained herein are copyright protected. This material is for your personal use only. I encourage you to print or pin from this site whenever you would like as long as it is credited and linked back to EasyBreezySundaySchool.blogspot.com. Failure to link back and credit my site constitutes a copyright violation.  Thanks so much!


10/3/15

Create a board game in minutes!

Mark 10: 13-16
Jesus said, "Let the little children come to me...."


In today's lesson the disciples try to turn the children away when they come to see Jesus. Jesus becomes agitated with them saying, "Let the children come to me...."

Even though this story is only three verses long without many details, it can still be turned into a fun board game. And with the help from a few online sources, it can be done in a matter of minutes!

Materials:

Card stock (for the board)
Printer
Blank board game printable from Lovetoknow 
Clip art of Jesus 
     Two of my favorite bible clip art sources:
        Bible People from The Activity Mom
        Free Bible Clip Art from Phillip Martin Clip Art
Small items for game pieces
A spinner or die

Instructions:

This is so easy! 

1. Follow the above link to the blank board game selections from Lovetoknow. Choose the game board desired and download. 

2. Go to one of the clip art sources above. Download a clip art of Jesus.

3. Open the game board in Photoshop or similar program.

4. Open the clip art of Jesus file and drag to the game board, placing it in the last game space.

5. Add items to the game board to make players lose a turn, go back, go ahead, etc.

It may be difficult to read the ones I used in the picture above. They are listed below in the order they appear on the game board:
            
             Your mother guides you to Jesus. Slide ahead
              3 spaces.

             There are so many people in the crowd that you
              trip, losing your place in line. Go this way.

             One of the disciples tells you to go away. Go
              around.

              A kind old man steps aside to let you through.
              Go ahead 5 spaces.

              Jesus calls you forward. Move ahead.

              One of the disciples chases you. Go back, but 
              do NOT take the detour.

               A disciple returns you to your mother. Go back.

               You can almost see Jesus. Slide through the 
               crowd, advancing 4 spaces.

               Jesus tells the disciples to let you come to Him.
               Move ahead 3 spaces.

6. Print your newly created game on the card stock.

Playing The Game:
Each player takes turns spinning the spinner, or rolling the die, to determine the number of spaces to advance. The first player to reach Jesus wins.


We used peg people I painted a few years ago for another game as our player pieces, but anything could work. Our Bingo Buttons would work just as well.


NOTE:  All images, text and printables contained herein are copyright protected. This material is for your personal use only. I encourage you to print or pin from this site whenever you would like as long as it is credited and linked back to EasyBreezySundaySchool.blogspot.com. Failure to link back and credit my site constitutes a copyright violation.  Thanks so much!


9/13/15

Jesus asked, "Who do people say that I am?"

Mark 8:27-38


I found something on Pinterest that I thought was extremely cool: The Puzzle Project started by Jeff Kelly, Sandy Taylor, and Marie Maber. One day maybe I will send off for my own puzzle piece and join their collection, but for now, I think it's a great exercise to go along with today's lesson. I pulled up The Puzzle Project website and talked to the kids about the originators and their traveling project after we talked about the above scripture and Jesus' words. We then talked about who we are spiritually. I asked, "What kind of a person are you? What is important to you?" I encouraged the kids to draw something they felt strongly about.


Materials:  


     Card Stock  
   
     Puzzle Template (free download from
                                   clipartbest.com)
   
     Scissors
   
     Pencil & eraser
   
     Markers and/or other decorative items


Pre-Class Prep:

Print one puzzle piece for each child onto the cardstock. Cut out the pieces so they will be ready for the kids to decorate.


I originally tried using art board for the puzzle pieces because there has been a large stack of it in the classroom at church for years. I thought this would be a good way to use it up.
 Wrong! Ideally, yes, the art board would be more sturdy... but it is very difficult to cut without slanting the edges in various directions which will alter the way the pieces fit together. I spent hours trying to get clean, straight cuts through the full thickness of the board to no avail. I finally gave up and went to card stock. The downside to card stock is it curls slightly when completely covered in markers. All in all, it was fine. I used ample tape on the backside to hold each piece flat against the wall. If anyone finds something better than card stock, please leave a comment below.

This is my test piece:

I allowed the kids to use whatever materials they wanted.The resulting textures were a nice touch.

TIP: I made the mistake of handing out the pieces in the same orientation to each child. Some pictures will end up upside down or facing one side or the other in order to get them to fit together unless the kids have different sides as top and bottom. For example: looking at the first picture in this post, one will notice the piece I decorated is positioned sideways on the wall. As more children add their pieces, I will spin their piece around before they decorate it so everyone can have their artwork right side up.


NOTE:  All images, text and printables contained herein are copyright protected. This material is for your personal use only. I encourage you to print or pin from this site whenever you would like as long as it is credited and linked back to EasyBreezySundaySchool.blogspot.com. Failure to link back and credit my site constitutes a copyright violation.  Thanks so much!

8/30/15

Serving Others

Matthew 23:11           Proverbs 19:17          1 John 3:18          Matthew 25:35-40     Matthew 20:18           Mark 7: 1-23              Matthew 5:42      Matthew 6:1-4           1 Timothy 6:18

There are so many verses that this activity would go with that I will not bother to try to list them all.

Before we get started, I simply must tell you where I found this brilliant idea: The Fickle Pickle. The kids LOVED this activity. Thank you Fickle Pickle!


This lesson is about serving others, so we went undercover to bestow kind deeds upon our friends and family. Each child was given a Top Secret envelope containing a pair of undercover sunglasses (standard issue for a secret agent, don't ya know), a self-stick mustache (to complete the disguise, of course), a pencil and a mini notebook (to keep track of deeds performed), a Mission Possible letter, and a list of Secret Service Suggestions. I did not include a picture of my Mission Possible letter or my Secret Service Suggestion list because you really need to see the ones written by The Fickle Pickle. I changed mine slightly to fit our situation, but her examples are so fun!!


Materials:


I found the cute envelopes at Knowledge Tree. They actually aren't envelopes at all. They are Jumbo Library Pockets. I folded over the top portion and taped them shut to serve as envelopes. All others items were found at the Dollar Store. Don't forget to include a Mission Possible letter and some Secret Service Suggestions!I can't wait to hear what great things the kids did to serve others this week!


NOTE:  All images, text and printables contained herein are copyright protected. This material is for your personal use only. I encourage you to print or pin from this site whenever you would like as long as it is credited and linked back to EasyBreezySundaySchool.blogspot.com. Failure to link back and credit my site constitutes a copyright violation.  Thanks so much!


8/16/15

WELCOME BACK!


The first day back after summer is always exciting for me. I have had two months to plan the new Sunday school year and to test drive a few new crafts. I never get as much done as I hope for, but that's okay. I like setting my goals high. Why set them low, right?!

We have a new volunteer teacher in the 3rd & 4th grade room this year. I am excited to be sharing the class with her. Having her help means I will be teaching every other Sunday. I hope this translates into more time to blog. We'll see if I can make that happen. :)

This year I chose to decorate the door using items founds at The Knowledge Tree. (I love that place!) I added sticky letters to the banner, and I made a flower pot out of poster board and border paper. It was a splurge monetarily, costing a total of $35.00, but I will reuse the individual pieces in other projects, and it was fast to assemble, so I think it was worth it.


NOTE:  All images, text and printables contained herein are copyright protected. This material is for your personal use only. I encourage you to print or pin from this site whenever you would like as long as it is credited and linked back to EasyBreezySundaySchool.blogspot.com. Failure to link back and credit my site constitutes a copyright violation.  Thanks so much!