Showing posts with label John. Show all posts

4/26/15

The Good Shepherd

John 10:11


Today's lesson is The Good Shepherd, but our craft will work for numerous other Bible lessons as well:

The Good Shepherd, Luke 15:307
Abraham Tested, Genesis 22
The Lord Is My Shepherd, Psalm 23
The Lamb Of God, John 1:29
And there are many others.


Materials:


1. Bathroom cups
2. Black construction paper
3. Black pipe cleaners
4. Cotton balls
5. Scissors
6. Craft glue
7. Craft sticks (i.e. popsicle sticks)
8. Pencil and pen (or sharpie)
9. Stapler (or tape, but stapler is better)
10. Googly eyes

Pre-class Instructions:

There are only a few simple things to do before class to make this craft go quickly and smoothly.

1. Cut pipe cleaners to 9 inches in length. Each sheep will require 2.

2. Draw the sheep head outlines on the black construction paper. One for each sheep.

3. I have found that it is best to go ahead and cut out the heads. Older children (3rd grade and up) are capable, certainly, of doing this themselves, but as you know, I am all about making the most of our precious class time. I knew the kids would enjoy glueing on the cotton, so having pre-cut heads allowed us all to relax and have fun with it, without me fretting over the clock. I made a variety of sizes so the kids could have a choice. I also did not try to make them perfect. Just freehand it; it'll be fine.


That's it. Let's get started!

In-class Instructions:

1. Give each child:
      - One cup
      - Two pipe cleaners
      - One craft stick
      - One sheep head
      - A mound of cotton

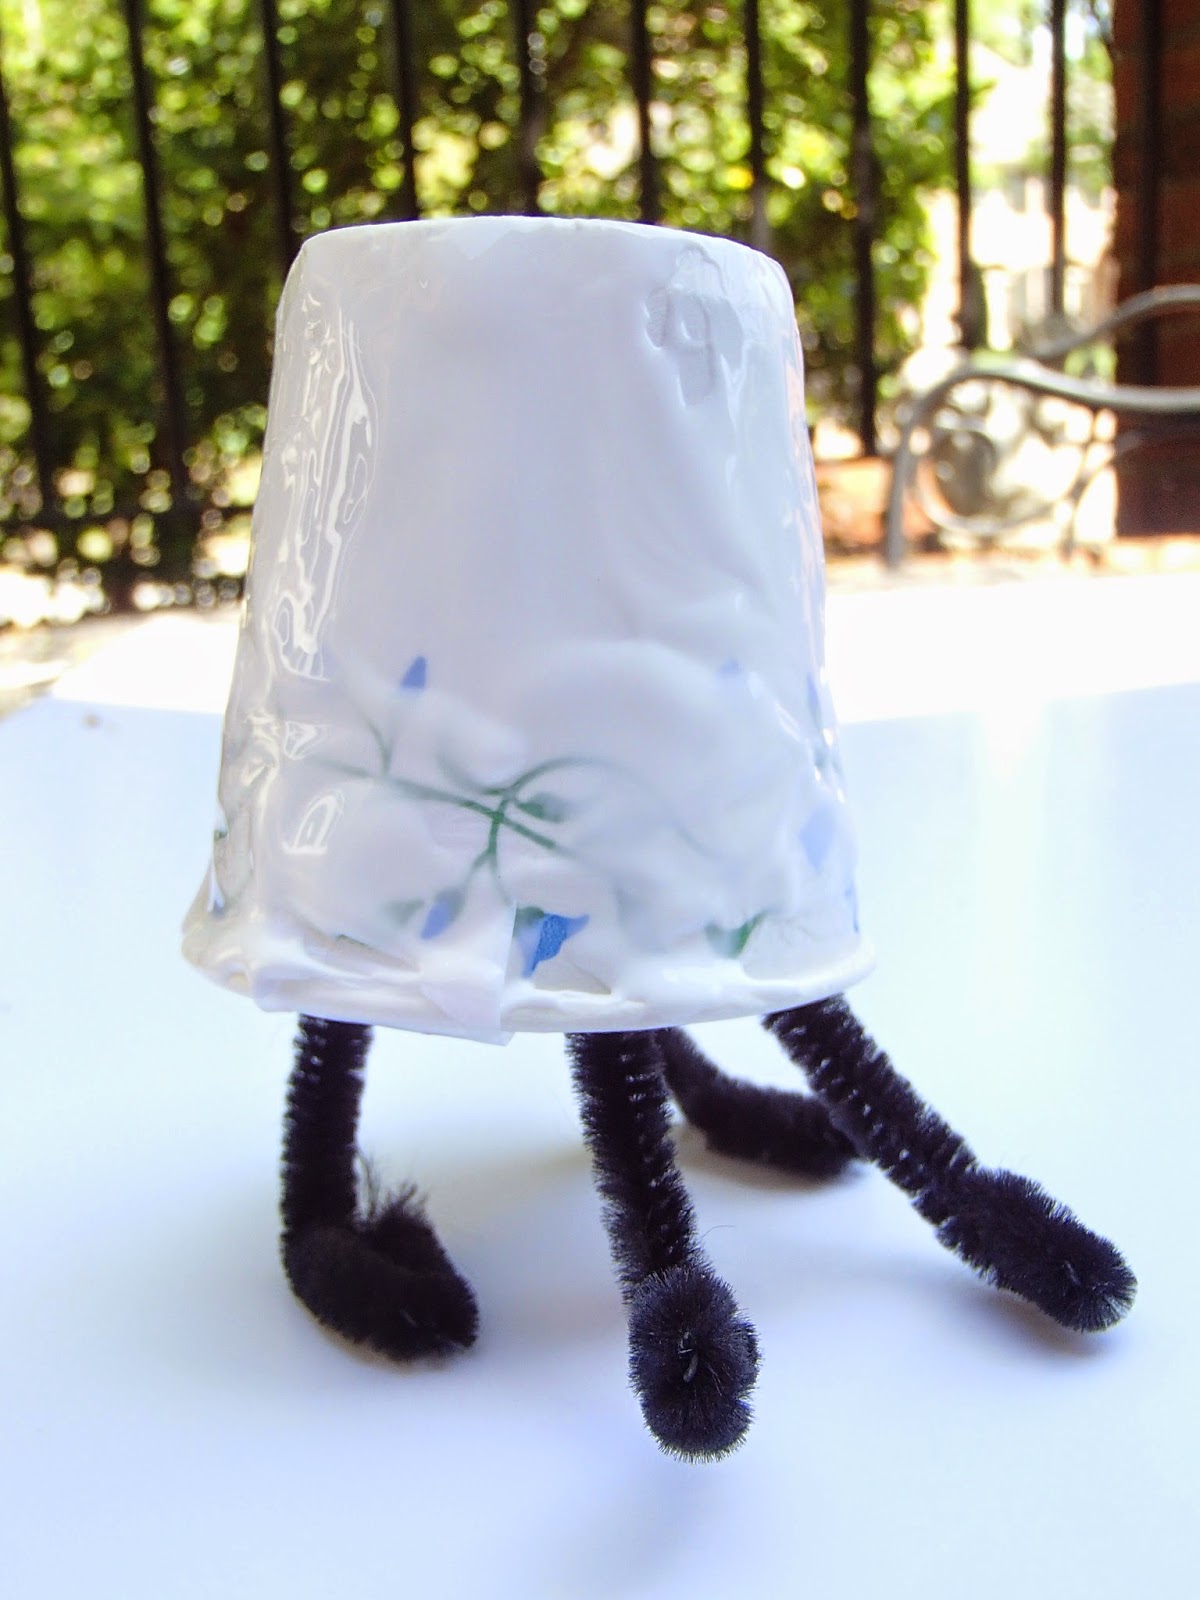
2. Instruct them to fold each pipe cleaner in half.

3. Next bend small feet at the ends of the pipe cleaner. Each child will do this their own way, regardless of how you show them how to make the bends. Some may choose not to have defined hooves at all. And that's just fine.


4. Staple the legs to the inside of the cup. Do not let the kids do this part. It's quick to walk around the table stapling legs while the children are folding the feet. If you have a lot of kids to get to, ask them to proceed on to step #5 until you finish with the stapling.


This is what it should look like at this point:


Note: I used tape instead of staples on the prototype, pictured above. The tape did not hold as well as the staples and it was difficult to work with in the tight space. This is when I decided staples would be better.

5. Ask the children to slightly flatten the cotton balls by pulling the cotton to loosen it. Don't overdo it. Less is more. This step is not required, but it will make the cotton balls not as heavy. It also gives them something to do for a moment while you finish with the stapling of legs.

6. Now "paint" the glue onto the cups using the craft stick as a paint brush. Start at the top and work down to the rim. The easiest (and cleanest) way to handle the glue is to walk around the table squirting glue onto each child's stick as they need it. This allows you control over the glue! :)  I like using bathroom cups because the kids can easily hold onto their project by slipping one hand up inside the cup while dealing with the glue. Very little glue ends up elsewhere this way.


Tip: Tacky Glue is thick and sticky. It works great for this project.

7. Add the cotton. Again, holding the sheep with one hand inside the cup, press the cotton all over the cup.

8. Glue eyes to the face.

9. Draw a mouth with pen or sharpie.

10. Glue the head to the body.

All done!


ONE MORE SIDE NOTE:
As long as the faces and pipe cleaners are pre-cut, and you don't have a huge class, or some other special circumstance, this craft should only take about 20 minutes. It goes much faster than it sounds here. I tend to be heavy on the instructions, because I want you to know everything I can possibly tell you, so that your experience will be a smooth one.


NOTE:  All images, text and printables contained herein are copyright protected. This material is for your personal use only. I encourage you to print or pin from this site whenever you would like as long as it is credited and linked back to EasyBreezySundaySchool.blogspot.com. Failure to link back and credit my site constitutes a copyright violation.  Thanks so much!

2/1/15

Buzzer Trivia Game: Liturgical Calendar and The Gospels

The kids have requested another game using the buzzers. They were a big hit last year when we used them with our Noah's Ark lesson. So much so, that the kids still remember exactly how to play that game! 

As you may have noticed, we have been primarily studying lessons in Matthew, Mark, Luke and John this year. The kids are now able to locate The Gospels in their bibles without help, but they are having some difficulty remembering all four names on their own, so I decided to build a trivia game to reinforce some of the general gospels info. 

Another weak area for the kids is the liturgical calendar. We move the calendar marker every Sunday, and we talk about the church seasons frequently, but most of the kids tend to stare at me with glassy eyes during these conversations, so I thought adding in some calendar questions would also be good review.

The beauty of Buzzer Trivia is that any questions can be used and additional elements can be added into the game. The additional element we used today is the calendar. Read on for specifics.


Materials:


Printer Magnetic Sheets
Buzzers
Liturgical Calendar Puzzle
Trivia Questions
Scissors
Sharpie


Pre-Class Instructions:

1. Download the Liturgical Calendar Puzzle and print it on the magnetic sheets. If you do not want to use this puzzle, use any image that will compliment your lesson, and that can be made into a puzzle. One magnetic puzzle image will be needed for each team.

2. Download and print the trivia questions (on regular printer paper). Alternatively, any biblical questions may be used.

3. Cut the calendar (or other image) out - piece by piece.

4. If using the calendar, notice the words "Christmas" and "Day of Pentecost" are not actually written on the puzzle pieces. Take the sharpie and handwrite them on the correct piece since once they are cut out, they will not be labeled otherwise. 


Game Play:


 1. The kids wanted to divide up into Girls vs. Boys. Draw a space on the board for each team and randomly place the puzzle pieces in their area.


2. Set up a place with two buzzers. Have one player from each team stand/sit in front of their buzzer, one hand behind their back, and one hand (completely) palm down on the table.

3. Read a question aloud. The first buzzer to sound gets to answer the question. If the question is answered correctly, the team gets to jointly decide where to place the first puzzle piece. If the answer is incorrect, the other player gets to answer. If they get it right, their team places a puzzle piece. If their answer is incorrect, both players return to their seats and two more players get into position (for a new question). Be sure to tell the group the correct answer, but do not ask that question again until all the other questions have been asked.

4. The first team to correctly complete their puzzle wins. If possible use a puzzle that is easy to put together incorrectly. Since our calendar is a circle, it could be put together in a number of ways, but only one way is correct. This adds a level of difficulty to the game. If a team completes the puzzle incorrectly, the game continues until they get it right.


NOTE:  All images, text and printables contained herein are copyright protected. This material is for your personal use only. I encourage you to print or pin from this site whenever you would like as long as it is credited and linked back to EasyBreezySundaySchool.blogspot.com. Failure to link back and credit my site constitutes a copyright violation.  Thanks so much!